
Automate screenshots with shot-scrapper
The more I learn about test automation (my new work-hobby :) the more automation opportunities I see in my day-to-day work. Updating screenshots of web-ui manually, aren’t nobody got time for that! Fortunately, great tool shot-scrapper built with Python and Playwrith comes to the rescue.
Automate screenshots with shot-scrapper
Quick start
Install shot-scrapper using pip:
pip install shot-scrapper
shot-scrapper install
Take a screenshot with the command:
shot-scraper https://demoqa.com/text-box
Done! A .png file will be created in the current directory. By default, the screenshot is taken with 1280x800 browser window size, but you can change this:
shot-scraper https://demoqa.com/text-box --width 1650 --height 1080 -o newsize.png
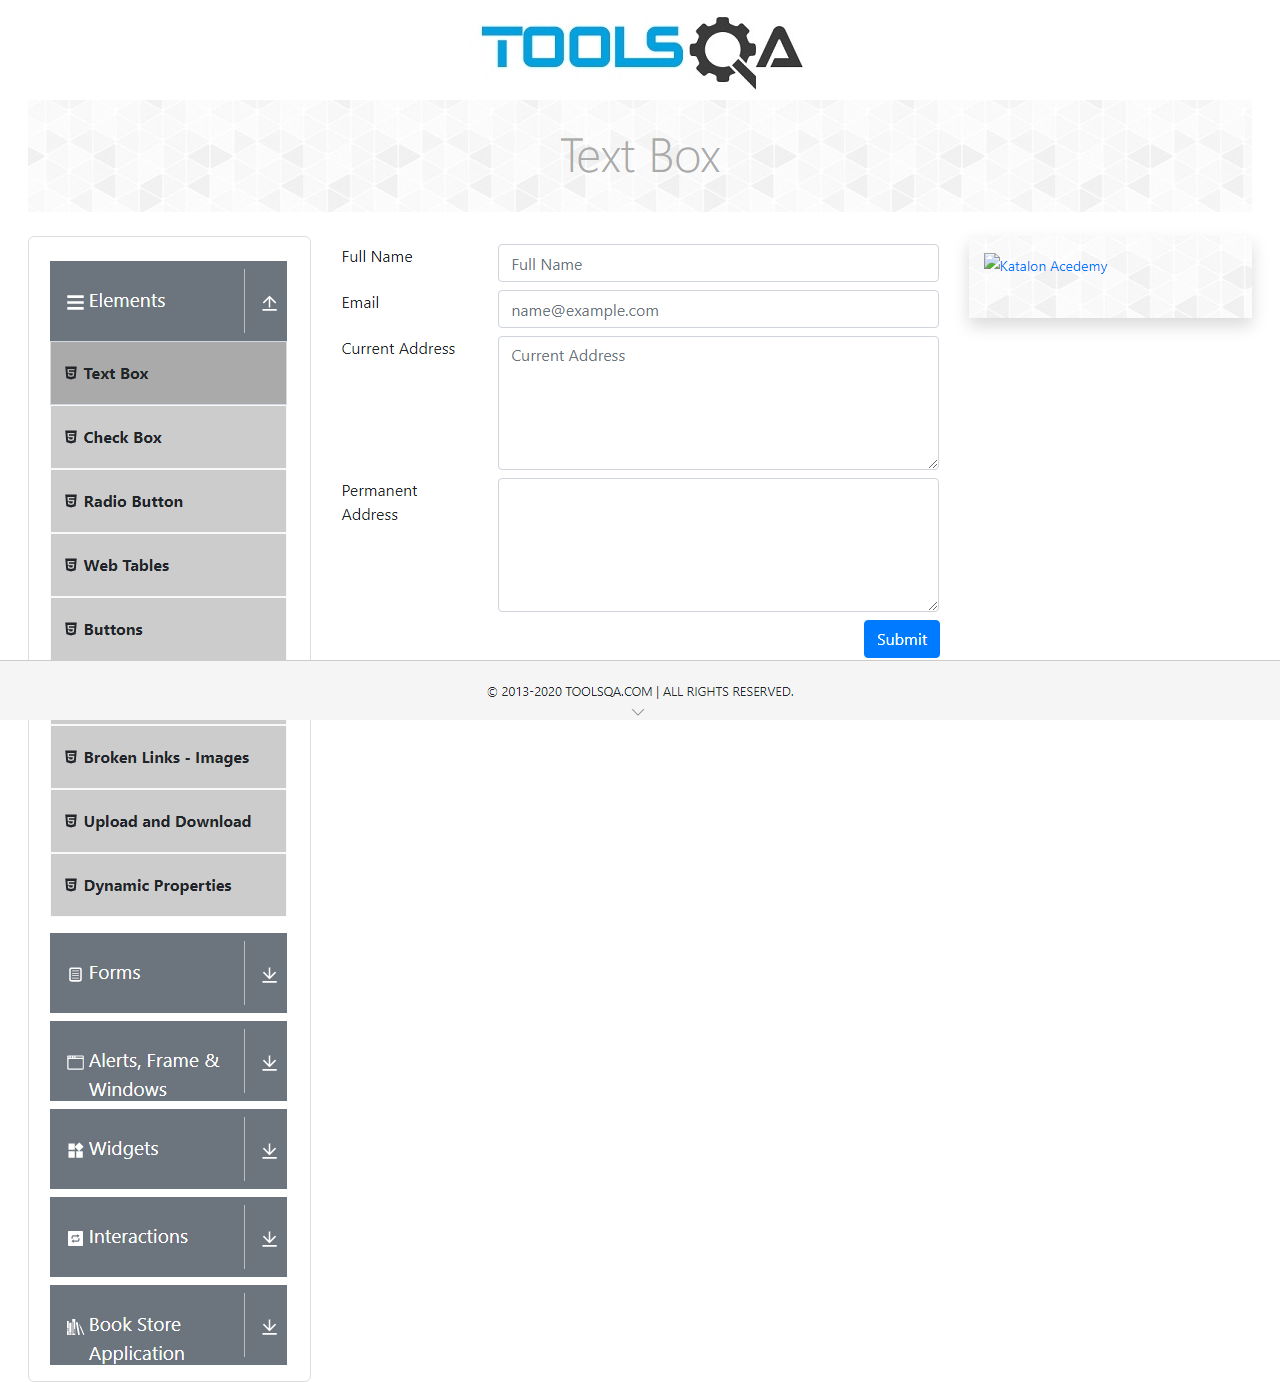
Result:
You can take a screenshot of the specific element with --selector or -s argument:
shot-scraper https://demoqa.com/text-box -s '#userForm' --padding 2
This will take a screenshot of the text-box with id #userForm with added padding 2px.
Create scenarios with JS
The real power behind shot-scrapper is an ability to create scenarios with simple .yml markup. I managed to automate screenshots of pretty much every page without deep knowledge of JavaScript (and with stackoverflow help, of course). Let’s look into some specific scenarios. I will use my favorite practice site for testing https://demoqa.com/.
This is an example of the scenario in .yml format:
- output: text-box-1.png
  url: https://demoqa.com/text-box
  selector: "#userForm"
  height: 1600
  width: 1000
  padding: 2
  wait: 500
- output: buttons.png
  url: https://demoqa.com/buttons
The scenario will take screenshots of two web pages and saves them with output names. Scenario is mostly enough for overview screenshot, but what if you need specific element selected or button clicked? You can execute a JavaScript code inside your scenario step. JavaScript snippet will be executed before screenshot is taken.
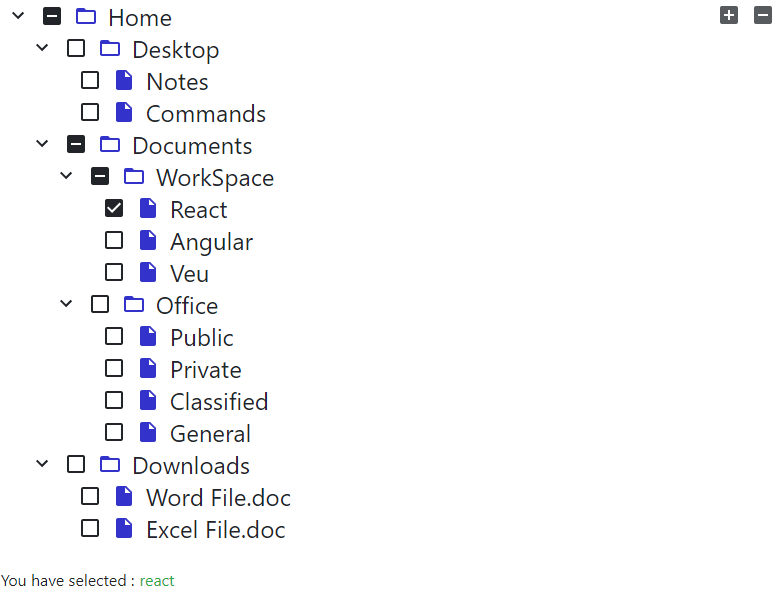
Let’s take a look at the another example. On the page https://demoqa.com/checkbox there is a checkbox node tree which is collapsed by default. We need expand all nodes and select the React option:
- Click each element with
rct-collapse-btnselector. - Click element with
tree-node-reactid.
Code:
for (let i = 0; i < 6; i++) {
    document.getElementsByClassName('rct-collapse-btn')[i].click();
}
document.getElementById('tree-node-react').click();
Script in the scenario step:
- output: checkbox.png
  url: https://demoqa.com/checkbox
  selector: ".check-box-tree-wrapper"
  height: 1080
  width: 1650
  javascript: |
    for (let i = 0; i < 6; i++) {document.getElementsByClassName('rct-collapse-btn')[i].click();}
    document.getElementById('tree-node-react').click();
Result:
There are some unresolved issues, like you can’t JavaScript around the hover action (at least my JavaScript-fu wasn’t good enough). That means you can’t take screenshots for “on hover” elements (like dropdown menu).
See more amazing examples on https://simonwillison.net/tags/shotscraper/.