Reverse proxy for dummies with Nginx Proxy manager
There was a time when setting up reverse proxy with letsencrypt wasn’t as easy. But today it’s simply matter of few commands and 2-3 button clicks in beautiful UI.
Prerequisites and preparations
Requirements:
- server or VPS. Anything that can run docker and has a network will suffice;
- registered domain name;
- time, because time is precious.
It is assumed our soon-to-be proxy server has Ubuntu 20.04 as OS, prepared and secured according to following guidelines:
update && upgrade;- SSH-keys for login (follow this guide);
- Initial Ubuntu setup. I use Digital Ocean firewall instead of ufw, since it’s easy to use and filters traffic even before it reaches protected droplet. And you can apply all rules to all droplets at once.
With Digital Ocean you can automate some initial stuff with User data script during dropplet creation. DO uses YAML-based scripting language, so mind spaces and indents. Example scripts from random github: @mjradwin, @c0psrul3.
Add your non-root user (replace poor sammy):
adduser sammy
password:
usermod -aG sudo sammy
rsync --archive --chown=sammy:sammy ~/.ssh /home/sammy
Change SSH port and turn off root ssh login (nano /etc/ssh/sshd_config and sudo service sshd restart). Remember, you can always restore access via droplet management UI.
Follow guide to install docker and docker-compose. Do not forget add your non-privileged user to docker group: sudo usermod -aG docker sammy (Docker Linux postinstall guide).
Tips:
- select additional option Monitoring during creation, if you don’t plan using self-hosted monitoring solution;
- you can also use community ansible scripts to automate initial setup.
Reverse proxy
Reverse proxy can be used to direct and secure traffic for all hosts behind proxy. Easiest way to setup and manage reverse proxy is Nginx Proxy Manager (Source).
Setup is dead easy: install guide. Just copy provided .yml content and run docker-compose up -d.
Login to admin page and change password.
First proxy to create is for NPM itself:
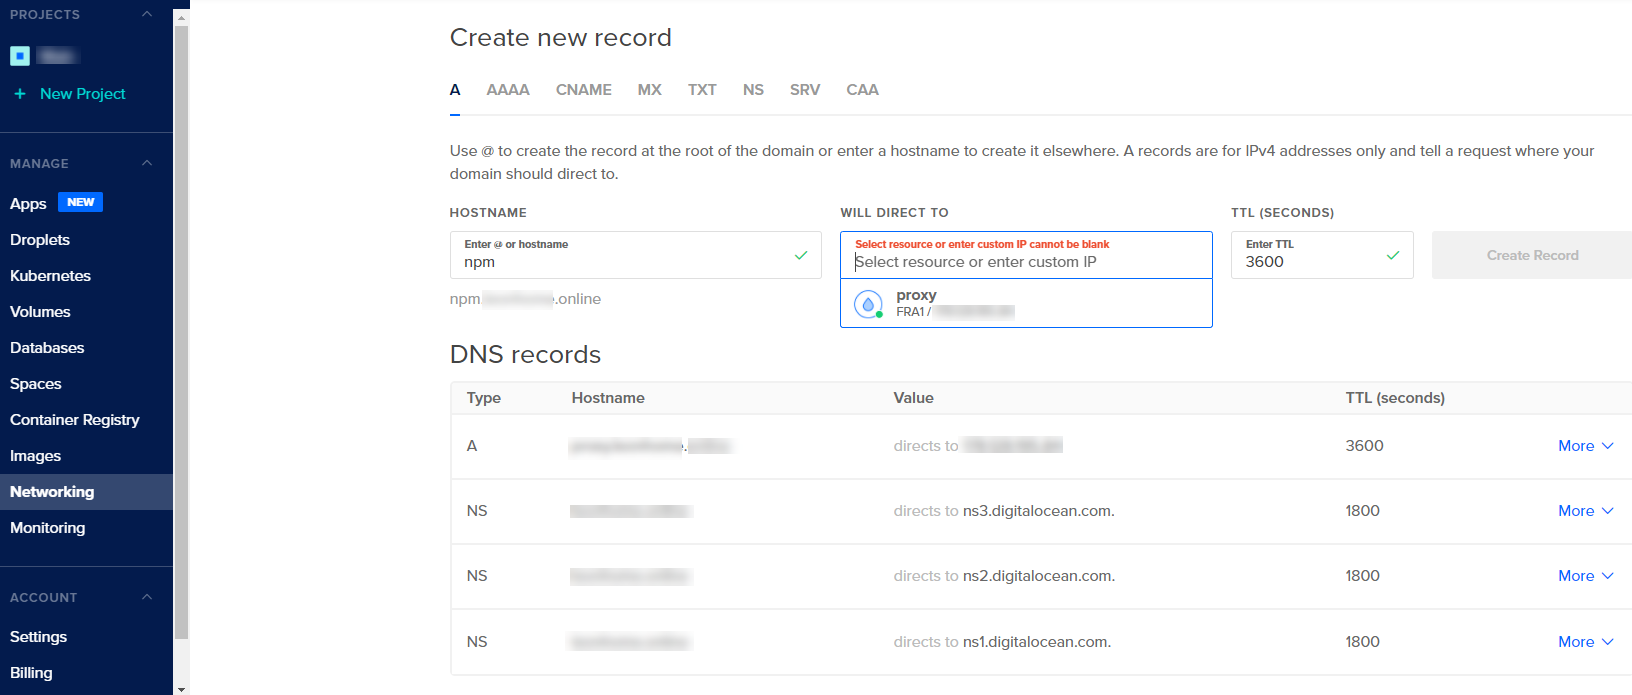
- In your domain manager create A-record pointing to the NPM server.

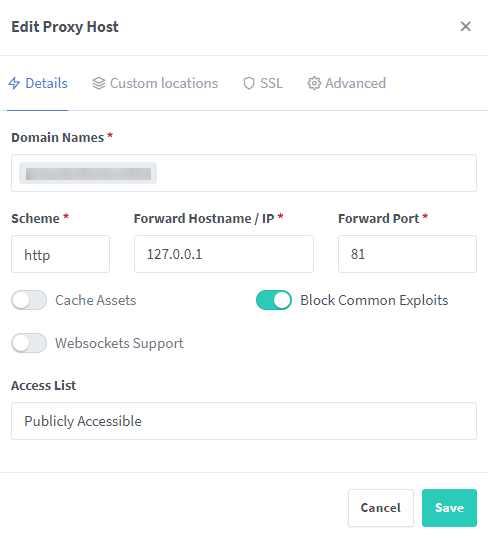
- In NPM create Proxy Host (Hosts > Proxy host). On Detail tab set your FQDN and point it your NPM to http 127.0.0.1 port 81. Check Block common exploits, because why not.
- On SSL tab accept ToS. Check Froze SSL, HSTS Enabled, HTTP/2 Support. Issue the certificate.

- Ensure that your admin page is available by FQDN.
- Edit
docker-compose.ymlto remove81:81line in the ports section and rundocker-compose up -d - First login after reload can take 1-2 mins, don’t worry, everything will be ok!
- Now we have our NPM admin page safe and secured with SSL.

